Most sliders in WordPress deal with horizontal images, but did you know vertical ones exist? That’s right, with the WordPress Vertical Image Slider plugin, you can easily add them to your website. And it’s really easy to use!
Just pick out your images, customize the slider, and place it with a shortcode. And thanks to this, you can even place it into your sidebar via a text widget. Just remember to size it appropriately if you do so.
Today, I will demonstrate how to use the WordPress Vertical Image Slider plugin.
Why Add A Vertical Slideshow in WordPress
A vertical slider offers users unique page layout opportunities, with the biggest being the potential addition to a sidebar area. Sliders, horizontal or vertical, are a great way to share multiple images in a small area and have multiple uses.
One of the most common places you see both types of sliders is on product pages. It’s quite common to include multiple images of a product on a sales page, and sliders are a great way to show off as many as possible.
Another common use is for before and after comparisons. A vertical slider might be a better option for certain images than a horizontal slider, it really depends on the orientation of the images.
A key advantage of the vertical slider is the ability to have text appear on the side, which makes for a more natural reading experience. With horizontal images, readers have to scroll past the image to continue reading, while vertical allows them to read and view the image at once.
How to Add A Vertical Image Slider In WordPress
Step 1: Install WordPress Vertical Image Slider
The WordPress Vertical Image Slider plugin is simple to use, full of customization options, and easy to implement thanks to shortcodes. The size of the slider is fully customizable, thus it can fit in on every website. And thanks to its responsive design, it works on any device.
There is also a Pro version that is worth the upgrade if you want to use several sliders and allows you to upload multiple images at once.
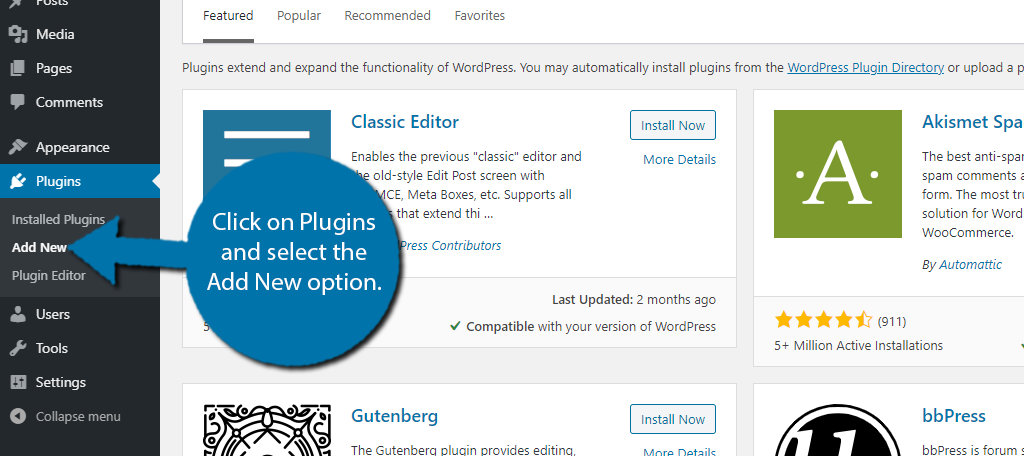
Let’s start by clicking on Plugins and selecting the Add New option on the left-hand admin panel.
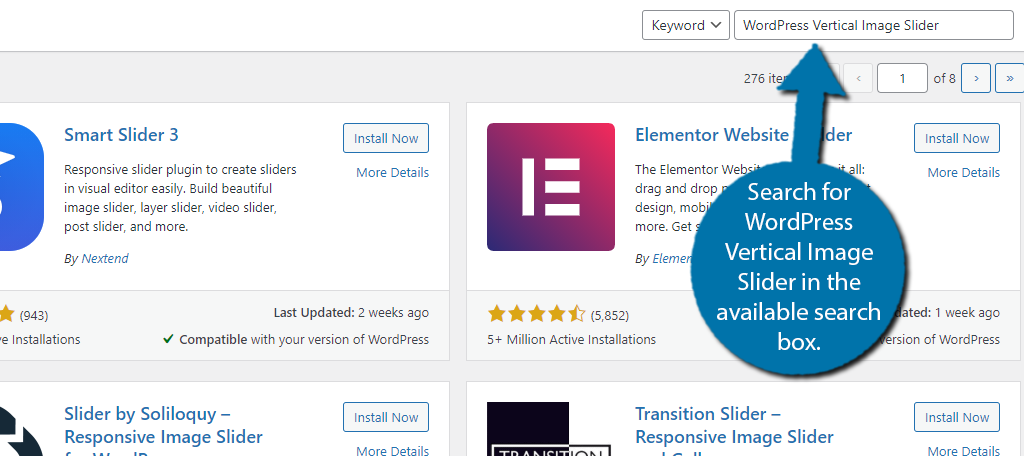
Search for WordPress Vertical Image Slider in the available search box. This will pull up additional plugins that you may find helpful.
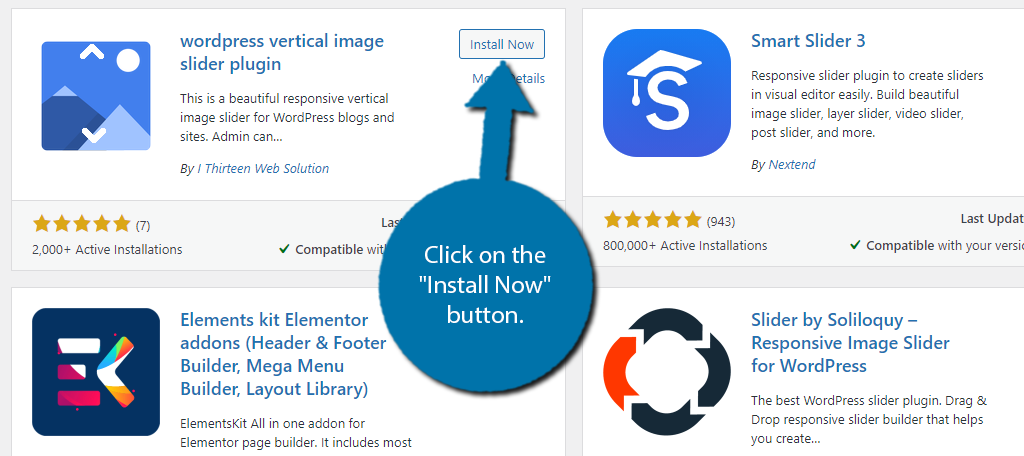
Scroll down until you find the WordPress Vertical Image Slider plugin and click on the “Install Now” button and activate it for use.
Step 2: Manage Slider Settings
You can either start uploading images or configure the setting next, but let’s start with the settings.
On the left-hand admin panel, click on Vertical Thumbnail Slider and select the Slider Setting option.
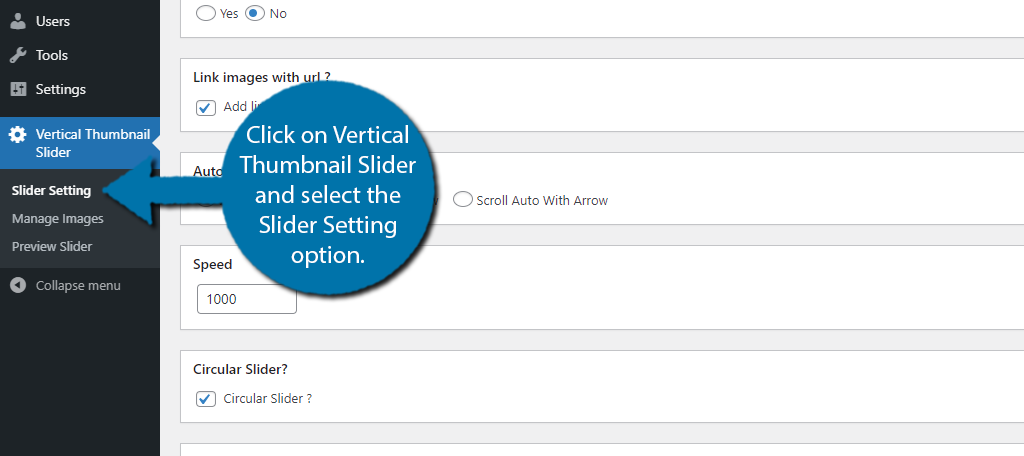
The first option is if you want your slider to be responsive. While there are a handful of uses when you would not want a responsive slider, most website owners should enable this feature.
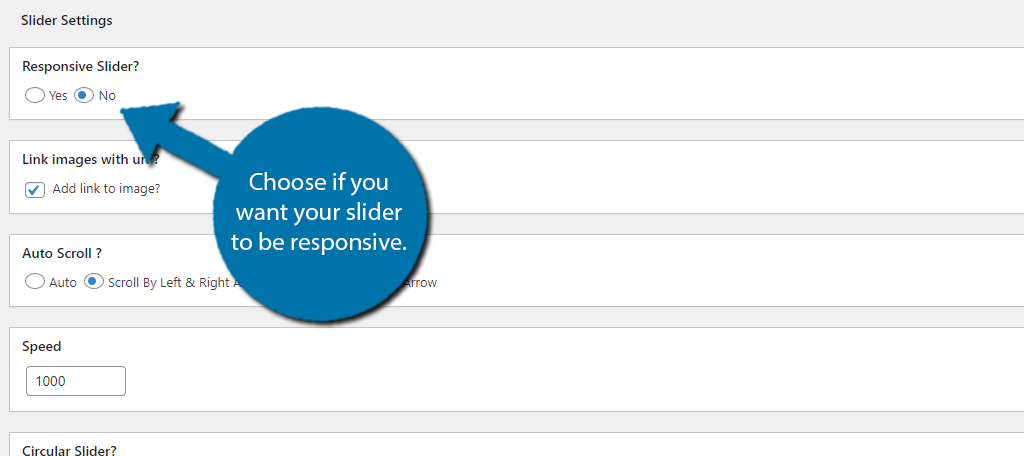
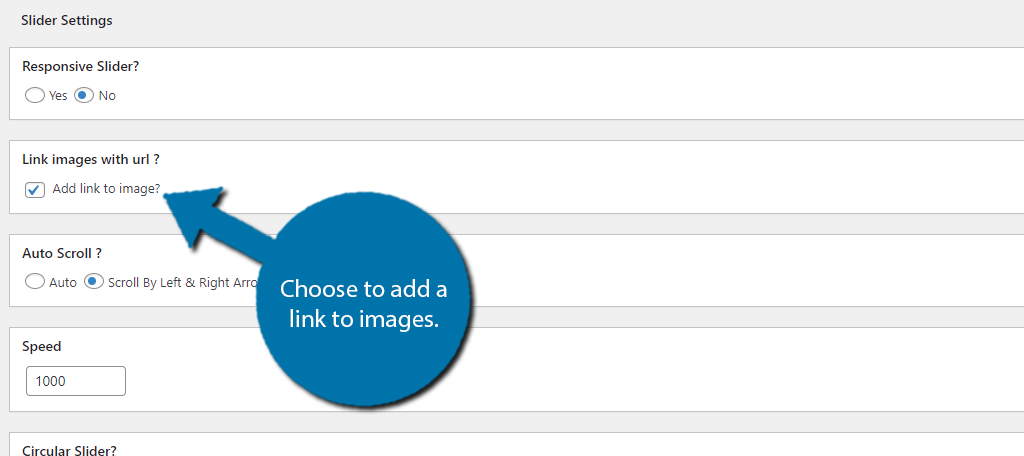
Next, you can choose if you want the image to have a link. That way every time a visitor clicks on it, they go to a specific page. This can be very handy if you’re using the slider on a home page to show off products or special promotions.
Below this, you can choose how the scroll will behave. The plugin provides three options, automatically, use the left and right arrows, or scroll automatically with the arrow. And under that, you can determine how fast the scroll speed is.
If you’re not sure what to pick, don’t worry, you can change this later on.
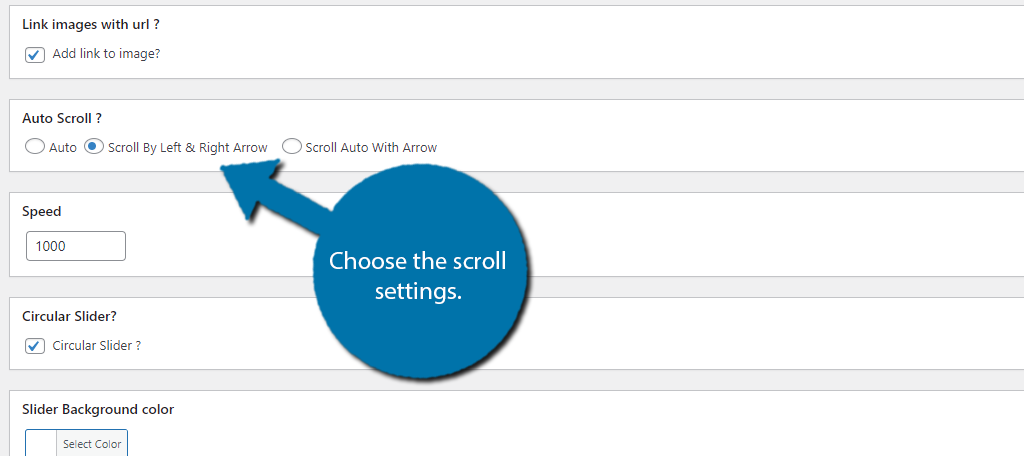
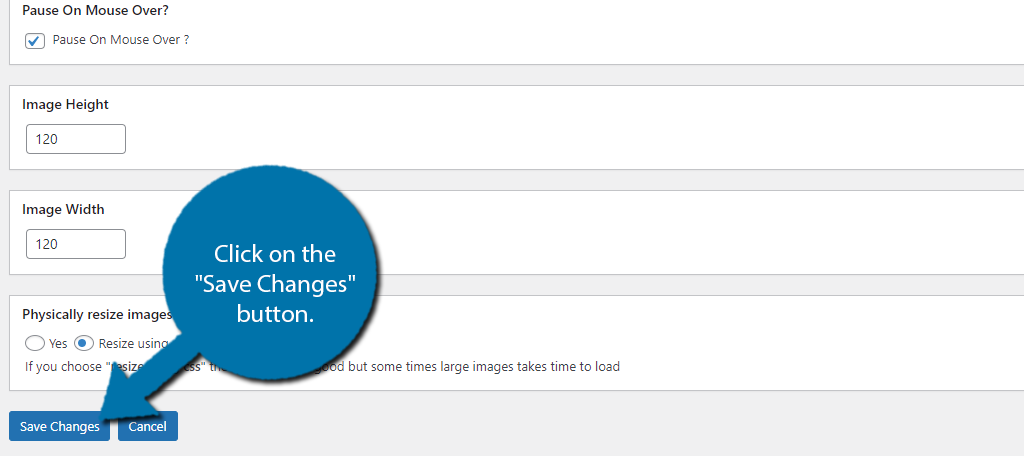
The rest of the settings deal with the appearance of your slider and include if you want the images rounded, the background color of the slider, how many images are visible at one time, how many items scroll at a time, if the slider should pause if a visitor hovers over it, and the image height and width.
Once all of the settings are in place, click on the “Save Changes” button.
Note: If you plan to use the vertical slider in a text widget, make sure it is properly sized for the sidebar. Each theme has unique dimensions, so refer to your theme for specific measurements.
Step 3: Upload Images
Now it’s time to start adding images to the plugin. While the plugin refers to it as uploading, you can actually just pick the images from your media library as well.
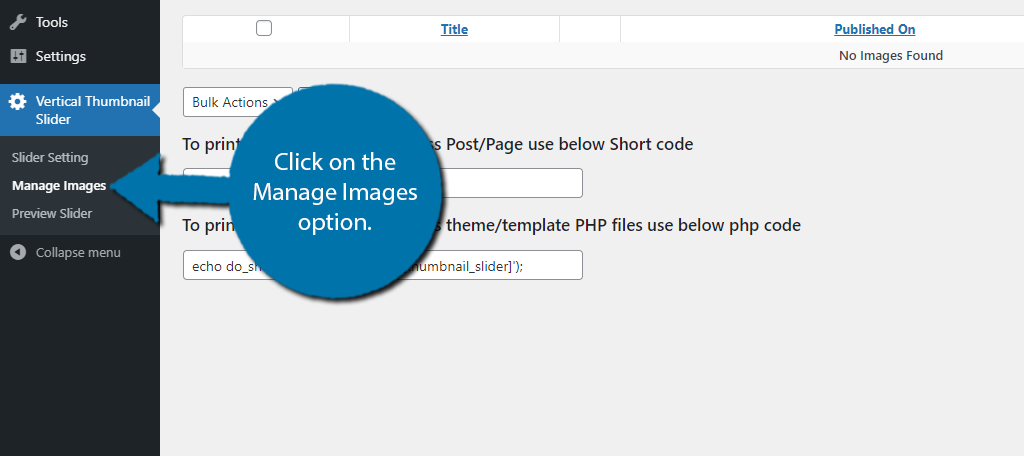
First, click on the Manage Images option.
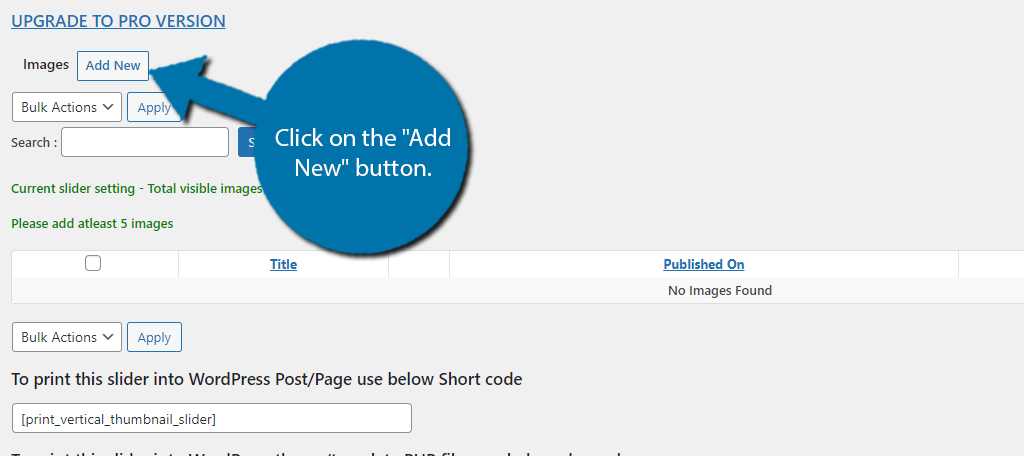
Click on the “Add New” button.
Click on the “Click Here to Upload” link. This will open up the media library. You can select images that are already in your library or upload a new one.
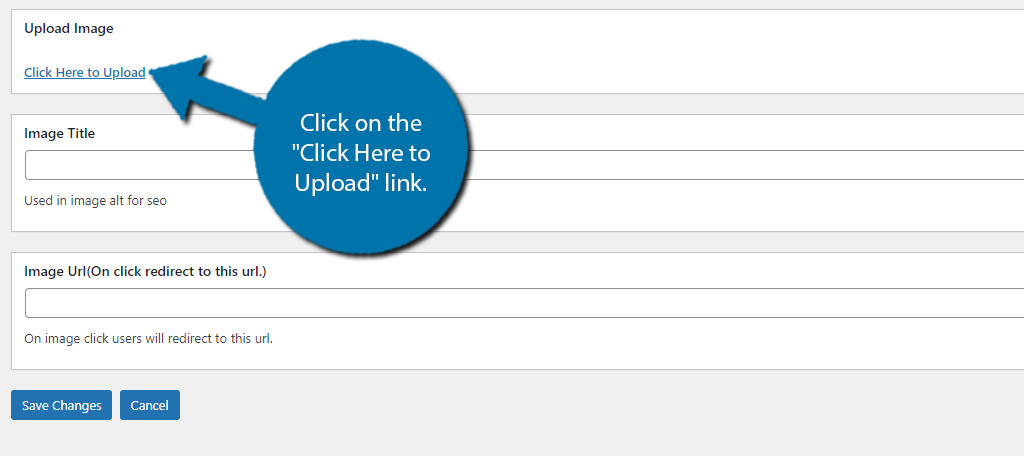
Next, you can add a title to the image, which is just to help you find it. And if you selected to add a link to the image during the settings process, you can enter that information in the appropriate text box.
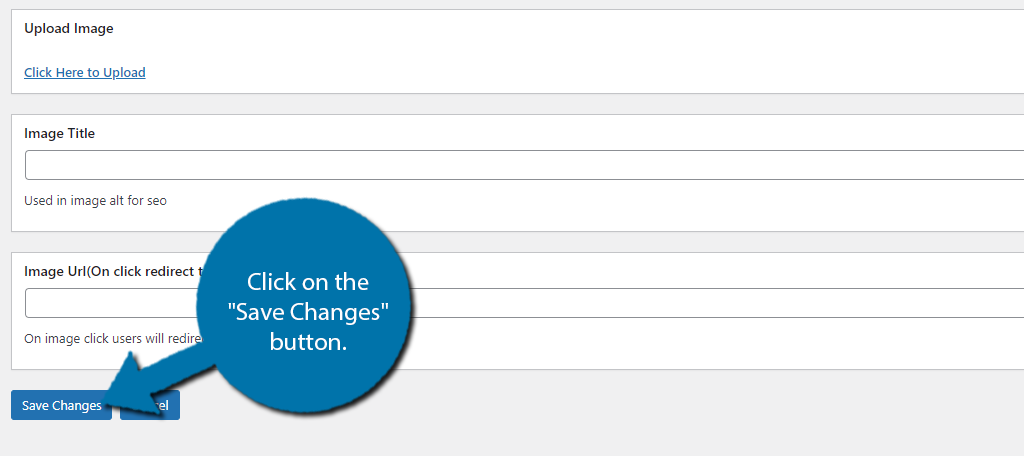
Click on the “Save Changes” button when you are done.
You can view all of the images you add and edit or delete them at any time. This is useful if you need to update a link. Repeat this process to add all of the images you plan to use within the plugin.
Step 4: Preview and Place the Slider
With the images added, you can actually preview the slider by clicking on the “Preview Slider” option. That said, you cannot view it on your website until you add it via shortcode or PHP.
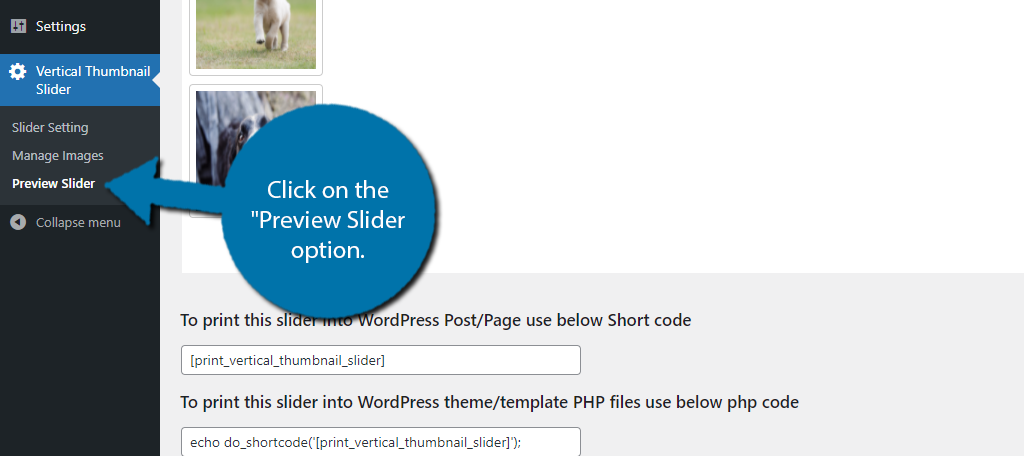
Below the preview, you can find the shortcode and the PHP code to add it in WordPress.
The PHP code will give you more control over the slider placement, but the shortcode is much easier. In fact, this is how you can add text to the side of the slider, however, where you place it is theme-dependent. Hence, you may need to contact the theme developer for more information.
You can add the shortcode to any post, page, or text widget. Adding it into a text widget basically creates a vertical WordPress image slider widget, which can be very handy. And just as a reminder, make sure you properly size the slider for widget use.
Once, the shortcode is in place, you can now view it on your website.
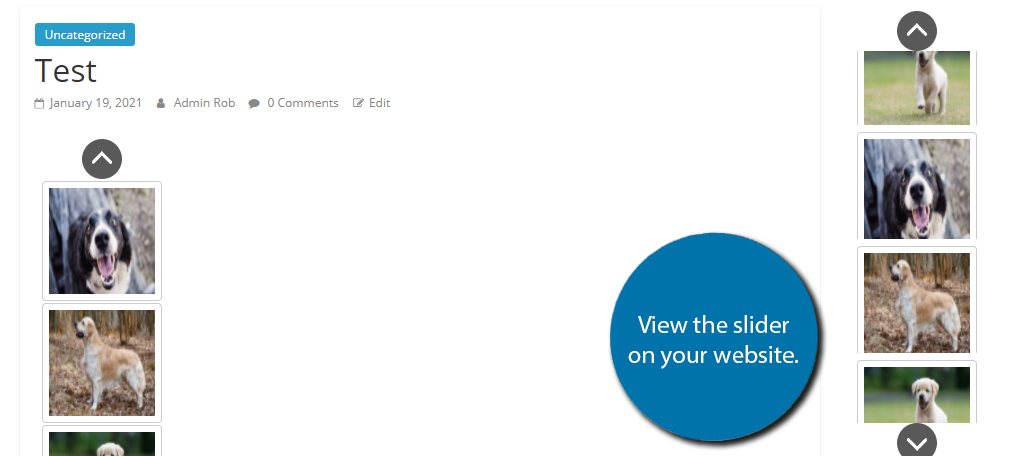
Congratulations on setting up the WordPress Verticle Image Slider plugin. Remember that you can customize the settings at any point to further tweak it. You can also change what images are present at any point.
To have access to multiple sliders, you will need to upgrade to the Pro version.
Save Space With A Vertical Slider Today
Vertical sliders are a great way to save space and can help your website use more creative page layouts. Some themes might have extra widget space to help you take advantage of shortcodes. For instance, ColorMag has a tone of extra widget space specific to the homepage.
Thus, you can really help your homepage stand out from the competition.
However, vertical sliders get the most use in the sidebar. They are a great way to promote events, new products, and just about anything related to your business. And as part of the sidebar, they are visible on every page.
What image slider plugin do you use in WordPress? Do you prefer vertical or horizontal image sliders?
The post How to Set Up a Vertical Image Slider in WordPress appeared first on GreenGeeks.


